Happy (groan) Tax Day!
April 17, 2018 | Posted in Shop Time, update | By fastwrecks
Greetings everyone, it’s the wonderful day everyone looks forward to… The deadline to file your taxes in the USA. Gag me with a goat horn. We got ours done and due to the recent changes actually got a small refund this year. I’ll have to watch my calculations a little better for the coming year, as I prefer to owe a little than get a little back.
The rest of April we’ll be updating old listings in the eBay store by ending them and refreshing them with new photos, better descriptions and updated pricing as well as continuing to add in new items from the #Chrysler #LeBaron and a bunch of #NOS #NAPA filters and other parts we purchased for resale from an enterprising local young man.
We’ll be looking for a new donor in May.
We hope all is well with you!
Spring and Status and Stuff
February 24, 2018 | Posted in 1989 Chrysler LeBaron Turbo, Family, Parts Cars, Shop Time, update | By fastwrecks
We know we promised the Chrysler LeBaron parts would be appearing on our eBay store soon, but we had a bit of a farm emergency in that Stormy, our 3 months out Boer buckling, developed pneumonia. We had almost a week of providing care for him including antibiotic and vitamin B complex injections, and close monitoring of him. We actually had him in the house and at the workshop with us for most of the last week. He’s made a great recovery and we’re now starting some deeper work around the shop to get ready to part out that LeBaron.
We’ll be taking a couple of days to tear down some old Mustang and other doors we have to post those parts online and clear out the shells, do a bit more cleaning and reorganizing of our workshop and then we should be pulling the LeBaron in by Tuesday to part it out. It has a strong running 2.2 turbo and builds solid boost, so if you need one, get in touch with us. You get a much better price buying direct versus waiting for it to be posted online.
Beyond that the goal is to get that torn down quickly, get the parts online, and get up to a pace of one car a month for the rest of 2018. Make sure you’re following us on Facebook @sportscarsalvage and on Twitter @fastwrecks for updates!
Think Spring!
Ford Escape Subframe Replacement
June 13, 2017 | Posted in Shop Time | By fastwrecks
Spoiler alert: You don’t have to pull the motor to do this. It can be done without a lift.
The great Ford Escape. These were recalled because the front subframes rusted out. Depending on the amount of rust when taken in for recall, one of two things happened. Either the subframe was replaced, or a crossbar was installed. Unfortunately, the crossbar does not magically stop the subframe from rusting. There will be problems down the road….literally….but you’ll at least be able to pull over in an orderly fashion instead of having your steering components going all different directions.. This one had the recall work done in 2014 where the crossbrace was installed, but the subframe rusted apart sometime in early to mid 2016. I was able to drive it up on the trailer, but it made horrible clunking noises.
Tools needed: Breaker bar, impact, jack, jackstands, lots of extensions, crowbars, hammers, swivels, metric sockets & wrenches, needle nose pliers, penetrating oil, an updated tetanus shot.
Put the vehicle on jackstands. Remove the lug nuts with a 19mm socket.
Remove the crossbar that mounts at the bottom of the subframe. It’s held on by 4 15mm bolts.
Remove the outer tie rod ends from the steering knuckles on both sides and remove the cotter pins from the castle nuts. The nut size can vary, but will be around 18mm. If they are stuck, tap on the knuckle until the outer tie rod end can be freed. Inspect these – I went ahead and replaced them while they were out already.
Remove the 21mm nuts holding up the front of the subframe. You will likely need a deep well socket for this.
Take out the 15mm bolts holding in each front lower control arm.
Loosen the engine support crossmember. It’s held onto the bottom of the subframe with an 18mm nut and to the front of the vehicle underneath with 2 15mm bolts. It will be held up by the rubber insulator, but will be able to be moved out of the way.
Remove the 21mm bolts that mount through the rear of the subframe and the rear control arms. The control arms will likely have to be pried out of the subframe.
Separate the rear transmission mount. I had to get this from the top with an 18mm socket, about 2 feet worth of extensions and a swivel. After this is out, the engine and transmission will move, but it won’t fall. If you can remove the back half of the mount from the subframe before dropping it, it will make your life easier. Use the same 18mm socket and the extensions to get this. (I had to wait to get this off until after I dropped the subframe and could get an impact directly on the nuts.)
Remove the 10mm bolt holding one of the steering hoses onto the subframe, also easily accessed from the top of the vehicle.
Drop the front driveshaft. It’s held on by 6 T-45 torx bolts at the front and 4 8mm bolts with clips at the rear. Remember to mark it before removing it so that it goes back in in the same orientation. (Thankfully there aren’t any splines to match up, but there are weights mounted to the front of the driveshaft)
Remove the 2 nuts from both exhaust flanges. They are 15 or 16 mm (The ones I removed were horribly misshapen) and remove the middle exhaust hanger. There is an exhaust hanger on the subframe, but this exhaust had been repaired and did not use that hanger.
At this point, if the subframe hasn’t lowered at all, pry on it with a crowbar. It should drop a couple of inches. You’ll need that couple of inches to remove the steering rack and the sway bar. If you are able to remove these from the wheel well, good for you!
The steering rack is held into the top of the subframe by 2 15mm bolts. Remove these and then gently pry the steering rack forward.
Remove the 4 15mm bolts holding on the sway bar. You may be able to get these from the wheel well. I had to get them from underneath because it was the only place for me to swing a 36 inch breaker bar. (I did say this was being replaced due to extreme rust, right? The nuts and bolts are no exception.)
The subframe is now detached. If the transmission mount is still attached, it will have to be gently wiggled out, as the steering lines wrap in and around the top and back of the subframe.
Re-assembly is slightly different than removal. I made sure to look up torque specifications before putting everything back together.
Side note: While everything is apart, it’s a good idea to check outer tie rod ends, shocks, etc. and anything suspension related that you won’t come into direct contact with as a part of this project. We ended up replacing the outer tie rod ends and the shocks.
The back half of the transmission mount was still attached to the subframe. I removed it before reinstalling everything.
The first thing I did was to put the front of the subframe on over the mounting studs with the 21mm nuts. I only put each one on a few turns so I could reach the steering rack and such.
Reattach the steering hose to the subframe with the 10mm bolt.
Put the transmission mount back on. It is held on by 2 18mm nuts and 2 18mm bolts. For this mount to line up with the front bracket and the subframe, the back of the transmission will need to be propped up.
Tighten up front subframe nuts. You may have to put the rear subframe bolts in for position temporarily.
Reattach the steering rack with its 2 15mm bolts. A pry bar may be needed to pop this back in its mount on the subframe.
Reinstall the engine crossbrace.
Reattach the exhaust and the driveshaft. Make sure the exhaust sounds good before doing anything further.
Put each control arm back into the subframe. This can be tricky – it took some doing to realign everything. A crowbar and a large drift were very helpful. Hold off on reinstalling the sway bar until you’re done with this part. You will have to remove rear bolts if you used them for position. I did this one side at a time so that things didn’t get too far out of position.
Now you can reinstall the sway bar with its 4 15mm bolts.
The last thing I did was to install the bottom crossbrace – it’s the straight bar across the bottom of the subframe held on by 4 17mm bolts.
If your shoulders aren’t killing you at this point, give yourself a pat on the back for a job well done 🙂
This year, I am thankful for….
December 3, 2016 | Posted in Family, Shop Time | By fastwrecks
….Not parting out another SUV.
After acquiring a series of collections of already parted out vehicles and consignment lots over the past year, I was itching to dust off my large collection of 10mm sockets and wrenches and part something else out.
Enter this 1987 Toyota Supra MK3 A70, which we got shortly before Thanksgiving.
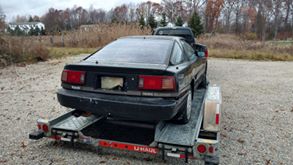
It has a blown motor and had sat for 5 years before we got it to part out. Fortunately, most of the other parts so far appear to be in very good shape. It has a black exterior, gray cloth interior, 180K miles on the drivetrain, and most of the electronics work. It’s 90% parted out right now. Our eBay store has a new category for the Supra parts, which I am adding to every day.
2016 has been a very productive year for us, both at home and around the shop. We’re hoping that 2017 is even better!
What’s happening?
October 22, 2016 | Posted in Family, Humor, Shop Time | By fastwrecks
In short, a lot.
You may have noticed that I haven’t written a blog post since April. Much has happened since then.
We got the second load of Porsche 914 parts in May, which I am still working my way through. There are still a few things to retrieve (mostly glass) but, for the most part, it’s in my workshop. I have seats, gauges, interior parts, assorted relays and modules, steering parts, a transmission, and much more. Visit our eBay store to see what we currently have listed. There is more being listed every day.
In June, we got two more goats. Tiara and Thompson were born in March of this year. They are Kinder goats (a cross between pygmy and Nubian goats) and are, of course, extremely adorable. Tiara will be old enough to breed next Fall. Thompson is her brother. We adopted them both so they could pal around together – Goats tend to pair up and we figured it would be good for them to have a similar age/size companion.

Thompson and Tiara, our Kinder goats.
July and August brought lots of gardening and outdoor adventures. We even started a new Facebook page to showcase our homestead adventures: https://www.facebook.com/witzendfarm/?fref=ts
Our nearly 1000 square foot garden was planted with mostly tomatoes for canning. This was the first summer that we had the goats, so mowing the yard was just a run of the mill chore, not an all-day project like last year. 2 acres is a LOT to mow and weed eat. When it wasn’t too hot to be at my workshop, we waded our way through Porsche 914 parts, tinkered with our 1985 Mercury Capri, and took in a few valuable consignment items. Our friends at AutoInterests had some assorted Mustang, Taurus SHO, and Jeep parts that they consigned to us to sell. You can find them in our Assorted New and Used Auto Parts category on eBay.
September was warmer than normal, so we enjoyed our swimming through the end of the month, more gardening, canning, and of course, garage time. Around this time, we started expanding our fenced area at home in anticipation of (surprise, surprise!) two more goats. They arrived at our farm a couple of weeks ago. Elliott is a 100% ABGA registered purebred Boer buck and his companion Blondie is a Boer/Alpine cross. He dwarfs all of the other goats at approximately 200#.
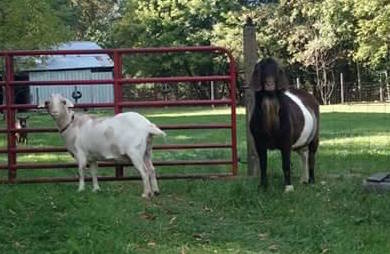
Our two newest goats!

The big E trying to look innocent.
That’s our past few months in brief. Here in the next few days, we will be receiving a Ford Escape to look at, plus I have been perusing our collection of automotive magazines and listing them in amongst the other parts. 2016 has been a very productive year for us all around and I hope to continue the trend.
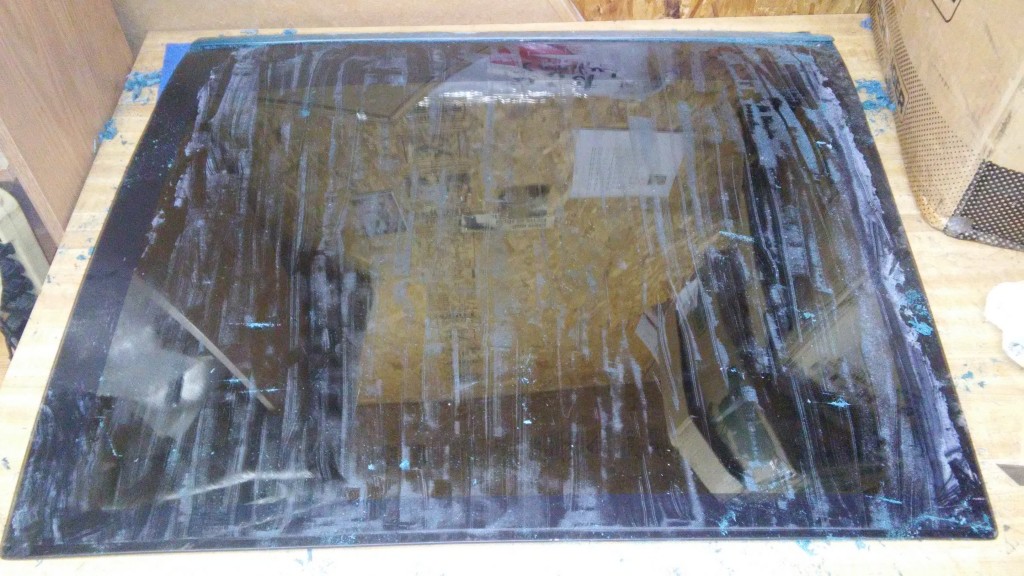
How to remove paint from auto glass – 3rd Gen Firebird T-Top
January 4, 2016 | Posted in Pontiac, Shop Time | By fastwrecks
We came across these T-tops from a third generation (1982-1992) Pontiac Firebird. They had been painted over once upon a time, and had been left in a garage for quite a while. The latch mechanism needed some WD-40, but this paint just….needed to go. It was extremely faded and worn out, especially around the edges.
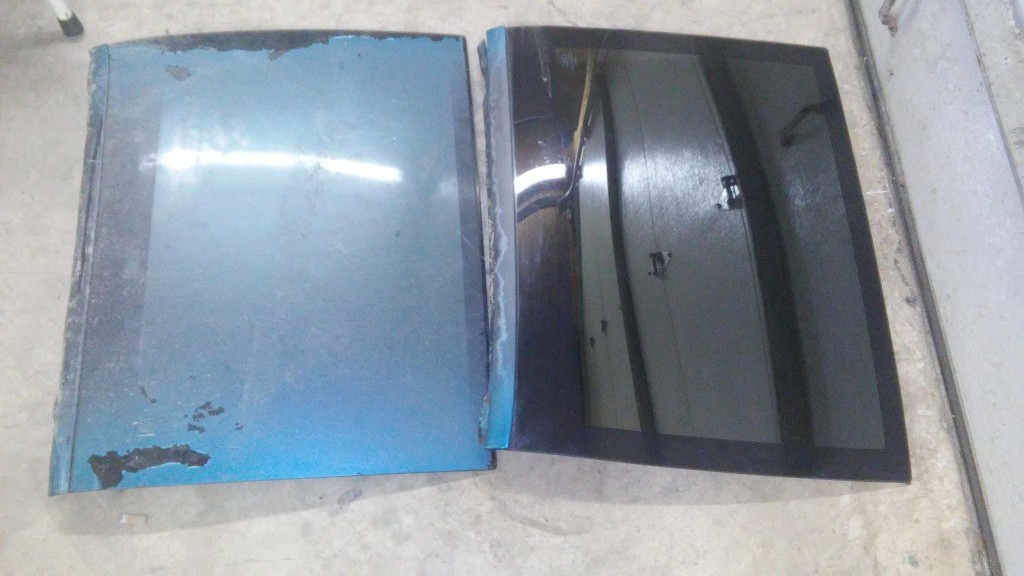
I watched some Youtube videos on how to remove paint from glass. I decided I’d try the razor blade method because I have plenty of those on hand. You won’t scratch up the glass doing this! The razor functions similar to an ice scraper. After verifying that the T-tops are actually glass, not acrylic plastic, I sprayed some Goof Off spray on the paint and let it soak in for a few minutes before starting anything. (Side note: some removable tops are made of acrylic. Goof Off specifically says in its instructions not to use it on that kind of material.)
This is after getting the majority of the paint off. At this point, I sprayed some more Goof Off to soak into the white residue. I then took the razor blade and scraped in the opposite direction as I did on the first pass.
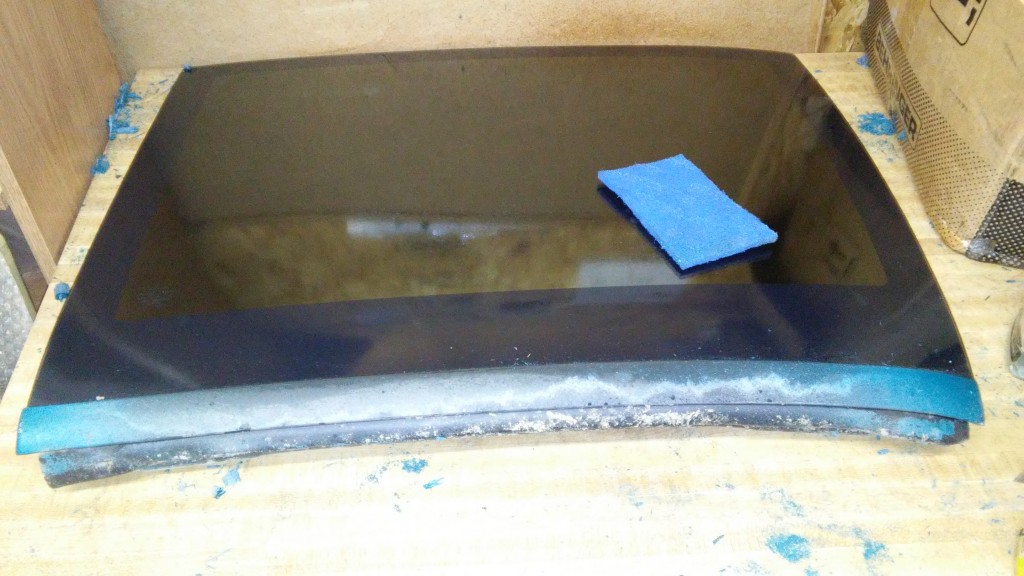
After the second go-round, I cleaned off the glass with glass cleaner to see what was left. At this point, a little Goof Off and blue Scotch Brite removed the little bit that was left. The photo is not blurry – Goof Off is working its magic.
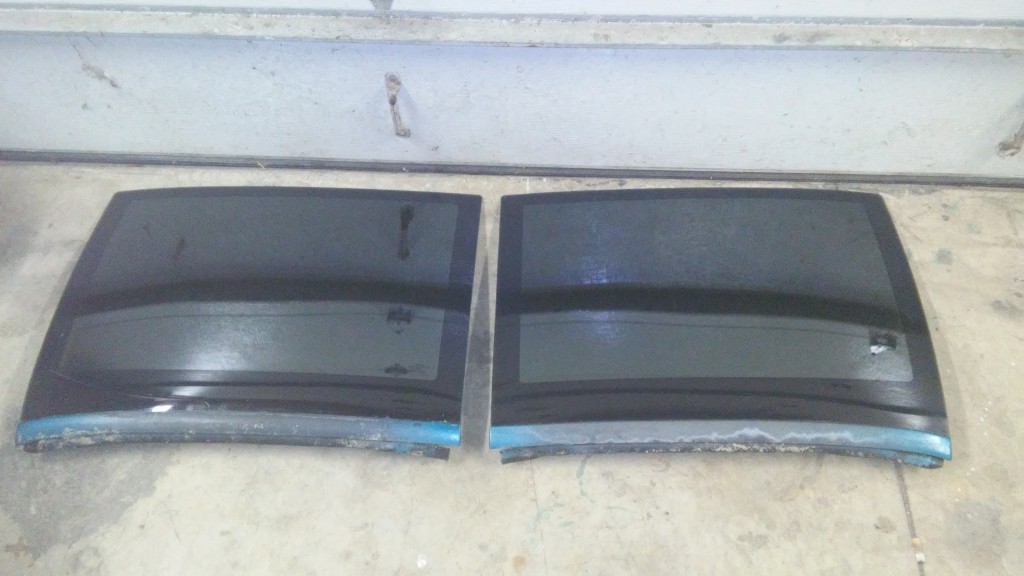
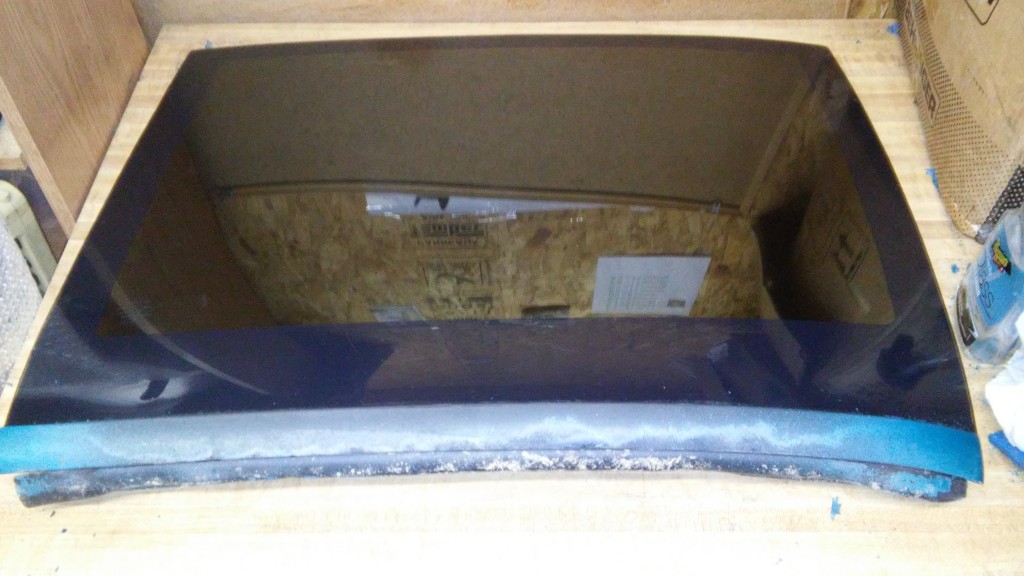
Wonderful! It’s a huge improvement. Total time was about 2 hours. The latch mechanisms are also getting easier to work with after being sprayed. This project was well worth the time and I encourage other people to try the same.
Back to basics – A 1977 Corvette
September 20, 2015 | Posted in Corvettes, Shop Time | By fastwrecks
We’re parting out a 1977 Corvette. Lots of useful parts on this one! This one suffered a passenger front corner hit, and then sat in a barn for several years afterward. The front clip is (as expected) a basket case and the interior is rough, but with it having originally been a southern car, doesn’t have a whole lot of rust. I’ll be listing parts on eBay as they come off the car.
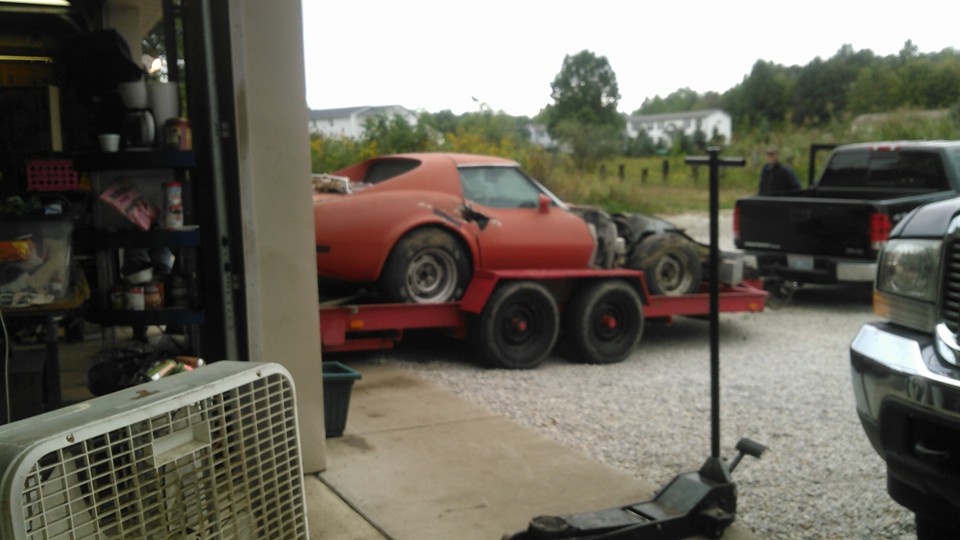
What can I say, my floor jack is oh so thankful that we didn’t bring in another 4 wheel drive vehicle or an 18 foot long land yacht. 🙂 While we originally had planned to make this into a restoration project, it had more significant damage that we noticed once we dug into things further.
That’s an odd-looking sports car….
June 2, 2015 | Posted in Shop Time | By fastwrecks
This past weekend, we had the opportunity to acquire (and start parting out) a 1995 Buick Roadmaster. It has 175,000 miles, power everything, and an interior in great shape. It had an issue with one of the brake lines, the starter, and a front spring, which is why it’s in our care now. It has a known good drivetrain, with the Gen 2 LT1 V8, 350 c.i/5.7 / 4L60E / Limited Slip 2.93 rear end.
I’ve been taking advantage of the unseasonably cool weather and parting out as much as I can. Its 18 foot overall length (in a garage bay 21 feet deep) is another motivator for me to work quickly on it. It’s looooooong. On the plus side, I don’t need a stepladder to reach anything on it 🙂 So, over the next few days I’ll be photographing and listing these items in our eBay store, at http://stores.ebay.com/sportscarsalvage.
I am ready for Spring. Who is with me?
March 4, 2015 | Posted in Shop Time | By fastwrecks
My secondary storage area has been impassable for a while now because of all the snow. The end result is…I have waaaaay too much stuff in my hair here at the moment. (I am not kidding…I’ve been running sales to clear out entire racks on shelves. Even with two new large shelves!) In fact, I’ve also been going through the older inventory and creating fresh new listings with new pictures
Fortunately, I was able to clear out enough space to work on this 2001 Oldsmobile Alero we got just recently. It’s unofficially for sale at the moment. I’m still working on a few things (nothing major) before advertising it. Including washing it….indoors.
That’s all for now. In anticipation of some new projects coming up, I’ve been doing some pre-spring cleaning of some old listings, our website, and some other general maintenance stuff. It’s good to have a relative lull in the action sometimes.
Amazon.com saves the day again!
February 24, 2014 | Posted in Shop Time | By fastwrecks
Isn’t Amazon.com just great? We ordered this this flex hone yesterday:
1-7/8″ (48MM) Flex Hone 320 Grit Aluminum Oxide
The best part is that it was mostly paid for via pocket change. What we do is collect up change (Some of the cars I’ve parted out have had several dollars worth!) and then redeem it for Amazon.com gift certificates at the local CoinStar machine. Unlike redeeming for cash, gift certificate redemption does not charge a percentage of every dollar. Perfect!
The hone should arrive within a few days. It’s one step closer to getting a 1997 Suzuki RM80 back on the road.
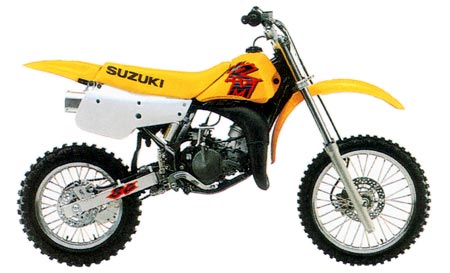
Stock photo of 1997 Suzuki RM80
This is our next project. It came to us on a trade right before dirtbike weather ended, along with a companion parts bike. The extra parts and accessories from that bike, plus some tooling, should get the RM80 back on the road….er, dirt…in no time. It will then be for sale or trade for other interesting items.
In the meantime, I will be wrapping up some other projects so I can have a full garage bay to dedicate to putting the bike back together.