November 14, 2011 | Posted in:Helpful Tips, Mazda
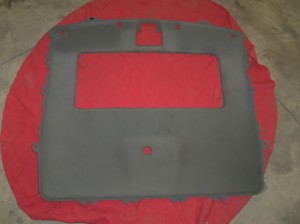
After dealing with a handful of Corvettes and a convertible Miata, I had almost forgotten the joys of removing a headliner panel. Let’s face it, removing and replacing a large rectangular piece of pressed cardboard-type stuff covered with cloth is not exactly most people’s idea of fun. But here are some general tips:
First off, if you can find a video on YouTube depicting somebody working on the same car you are, all the better. I find online video guides very helpful when working on cars….that, and there isn’t always a Haynes manual at my disposal.
Make sure that any trim pieces holding the headliner in place have been removed first. Depending on the car, some have trim panels along the sides of the headliner that mount to the car and conceal a row of clips underneath. Others have corners underneath the A pillar trim pieces, which are often held in place by a combination of (often artfully concealed) screws and clips. Take off your sun visors and (if needed) the rear view mirror and interior light assembly.
Get a good idea of what is holding the headliner in place before jumping in with both feet….hands…whatever. I can’t tell you how many interior trim pieces I’ve seen utterly destroyed by the “When In Doubt, Just Yank Harder” approach. You may be dealing with hidden plastic clips a few inches apart, like on the backside of a door panel, plastic screws, or the like. A door panel removal tool and/or a flat-blade screwdriver will be helpful here. The key is to work with care and not get in a rush. We’re talking about a piece of pressed board here that (in some cases) is as big and awkward as your 6th grade science fair tri-fold poster.
You can give the headliner a gentle tug to get an idea of where it is still attached, but yanking with all of your might is a big no-no.
If you have a sunroof, you may have to remove a piece of trim, weather stripping, or something like it around the perimeter of the sunroof to complete the process. Then, go around the edges with a flat-blade screwdriver just to test the waters. If there aren’t any clips or screws, you may find that all you need to do is gently pry around the edges. Try this in a relatively inconspicuous place.
That’s it…the trick is to go slow, be careful, and NO YANKING!
**Science fair image courtesy of http://www.flickr.com/photos/oakleyoriginals/3229259616/
fastwrecks
Welcome to Sports Car Salvage. We are a niche hobbyist sports car dismantler located in Northeast Ohio, selling parts for C4 & C5 Corvettes, Mazda Miatas, and other sports and performance cars. We also restore diamonds in the rough. Let us help you with your restoration project.
Leave a Reply
*


Be the first to comment.